Method Guide · Inspired By Steven Raichlen
Two-Zone Fire Setup
Two-Zone Fire Setup for Any Grill — one hot side, one cool side, on the charcoal kettle or gas grill you already own. The single technique that fixes “burnt outside, raw inside.”
Research Draft — Not Yet Kitchen-Tested
Independent adaptation, not an official recipe. This is our own independently developed method, informed by Steven Raichlen’s publicly documented grilling technique. It is not his recipe, and this page is not affiliated with, endorsed by, or officially connected to him. See the Steven Raichlen profile for the technique background this method is based on.
Test status: researched and written from verified technique sources, not yet physically cooked and evaluated in our kitchen. The setup itself is standard grilling equipment use; treat any specific timings for individual foods as a starting range, not a guarantee.
What makes this distinctive
Most beginner grilling advice is written around one food. This isn’t — it’s the underlying setup that makes almost everything else on a grill work better, because it turns one grill into two different cooking environments you can move food between.
What we changed
Written to cover charcoal and gas side by side, rather than assuming one — most two-zone guides online only cover charcoal. We also added a simple hand-heat test for judging zone temperature without a thermometer, since not everyone grilling has an infrared probe on hand.
Equipment
- Any charcoal kettle grill, or a gas grill with 2 or more independently controlled burners
- Chimney starter (for charcoal)
- Long-handled tongs
- Instant-read thermometer (helpful, not required — see the hand test below)
Ingredients
None — this is a fire and equipment setup, not a recipe. It applies to whatever you’re cooking.
Step by step
1. Charcoal: light and bank the coals
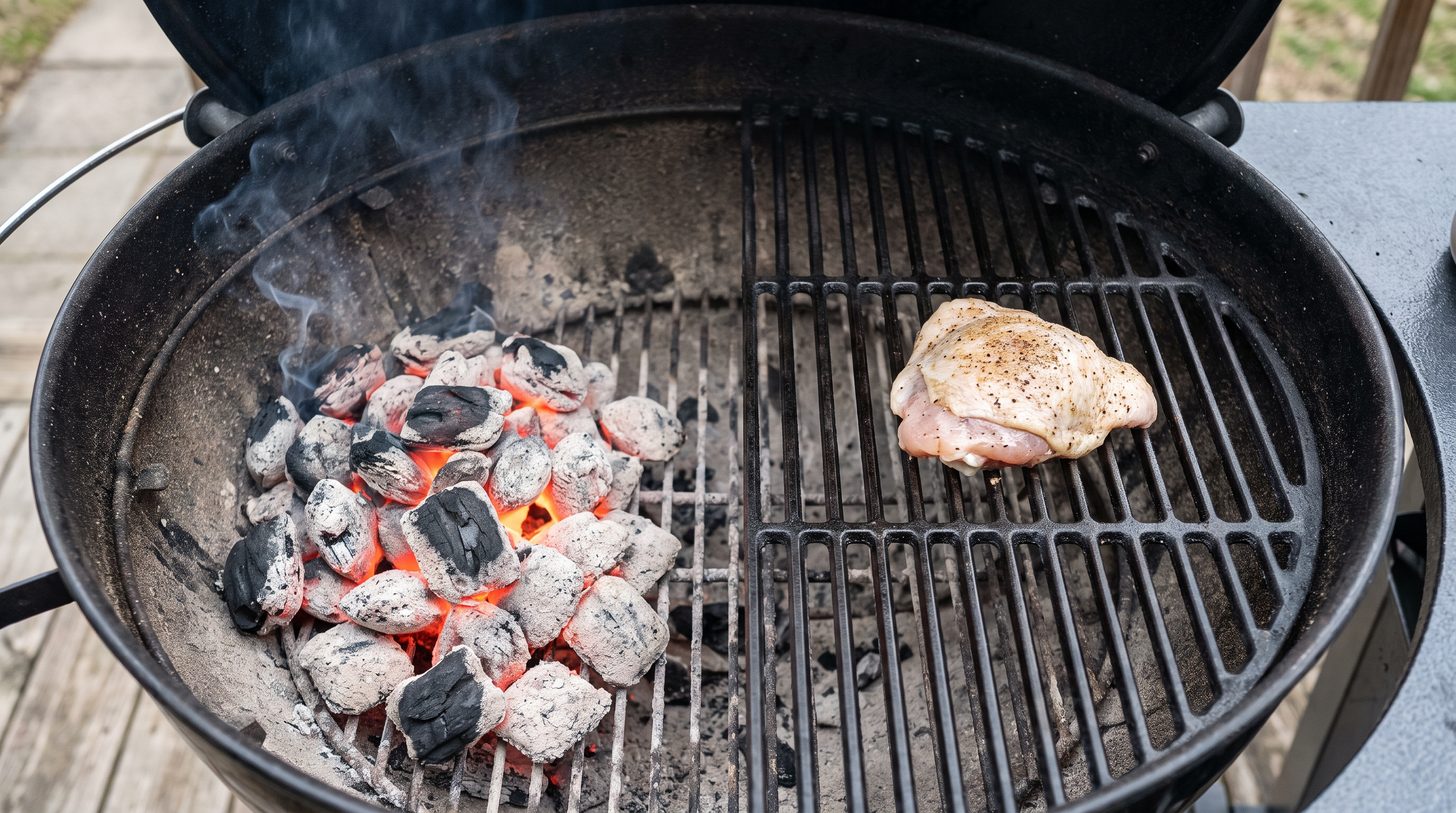
Light a full chimney of charcoal. Once ashed over grey, pour it all onto one half of the charcoal grate, leaving the other half completely empty. That’s your two zones: direct heat over the coals, indirect heat over the empty side.
1 (alt). Gas: light half the burners
Light only the burners under one side of the grate and leave the rest off. Close the lid and let the grill come up to temperature, roughly 10 minutes, before cooking.
2. Judge the zones
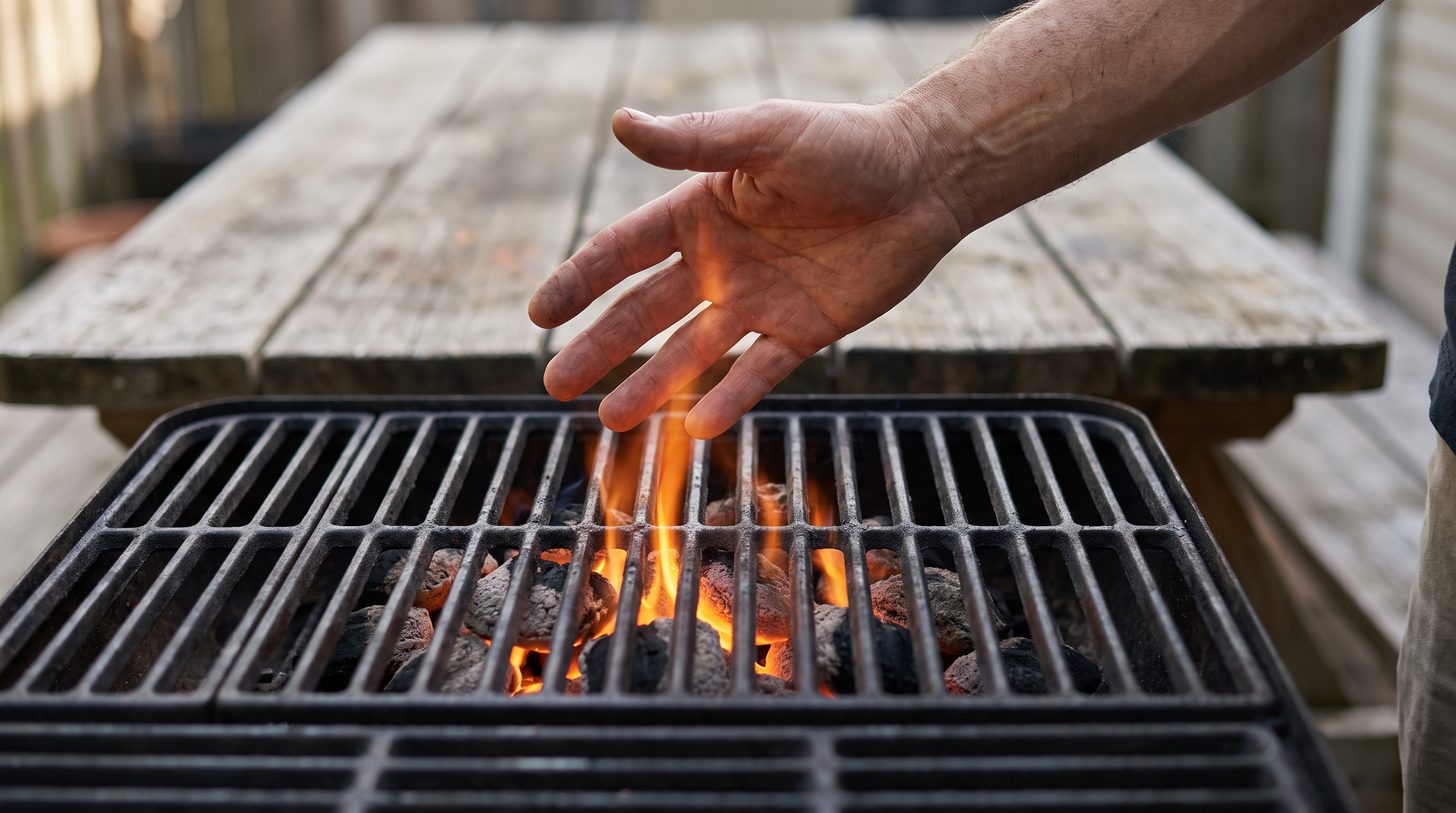
Hold your hand about 5 inches above the grate. If you can hold it there for only 2 seconds before it’s too hot, that’s a hot direct zone (roughly 450–550°F). If you can hold it there for 6–8 seconds, that’s a moderate zone (roughly 350–400°F) — useful for food that needs longer over some heat. The empty/unlit side with no direct radiant heat is your indirect zone.
3. Sear direct, finish indirect
Start food that benefits from a hard sear — steaks, chops, chicken pieces — over the direct zone for colour, then move it to the indirect zone to finish cooking through without the outside burning. For large or fatty cuts (whole chicken, pork shoulder, ribs), skip the direct zone almost entirely and cook mostly indirect with the lid closed, like a small oven.
4. Manage flare-ups
If fat dripping onto direct coals causes a flare-up, move the food to the indirect side for a minute rather than leaving it over the flame — flare-ups add bitter char, not flavour.
5. Maintain the fire on longer cooks
On charcoal, add 8–10 unlit briquettes to the hot side every 45 minutes to an hour on a cook longer than that. On gas, simply adjust the lit burner’s dial as needed — gas holds temperature far more predictably than charcoal.
Temperature targets
| Zone | Approx. grate temp | Use for |
|---|---|---|
| Direct, hot | 450–550°F | Searing steaks, burgers, quick vegetables |
| Direct, moderate | 350–400°F | Bone-in chicken pieces, sausages |
| Indirect | 275–325°F | Whole birds, roasts, ribs, anything large or fatty |
These are grate/zone temperatures, not food safety temperatures — always confirm doneness with a thermometer in the food itself: 165°F for poultry, 145°F + 3 minutes rest for whole cuts of pork and beef, 160°F for ground meats. Source: USDA Food Safety and Inspection Service.
Timing
Timing depends entirely on what you’re cooking, which is the point of this setup — it’s the fire configuration, not a single dish. As a rough frame: direct-zone items are usually done in minutes per side; indirect-zone items run anywhere from 20 minutes (chicken pieces) to several hours (whole shoulder), and should always be confirmed by internal temperature, not the clock.
Visual and feel doneness signs
- Direct-zone food: firm to the touch, clear grill marks, juices running clear on poultry
- Indirect-zone food: internal thermometer is the reliable signal — appearance alone is misleading on longer cooks
- A fire that’s dying rather than just cooler shows grey, collapsing coals rather than glowing orange ones — that’s a sign to add fuel, not just wait
Common mistakes
Cooking everything direct
The single most common beginner error — large or fatty cuts burn outside long before the inside is done.
No lid
The indirect zone relies on the closed lid acting like an oven. Leaving it open defeats the setup.
Ignoring flare-ups
Leaving food over a flare-up adds bitterness, not flavour — move it, don’t wait it out.
Equipment-specific adaptations
Charcoal kettle
Bank coals to one half as described. A kettle’s dampers control airflow and therefore heat — open more for hotter, close down to hold steady.
Gas grill, 2 burners
Light one side only. Less flexible than a 3+ burner grill but still gives a real hot/cool split.
Gas grill, 3+ burners
Light only the outer burners and leave the centre off for a true indirect zone in the middle, or light one end for a simpler two-zone split.
Substitutions
None needed — this is equipment technique, not ingredients. If your grill has only one heat zone (a small hibachi-style grill with no lid), true indirect cooking isn’t possible; that kind of grill is better suited to direct-only, fast-cooking foods.
Storage, reheating & food safety
Refrigerate any leftovers within 2 hours of cooking (1 hour above 90°F ambient temperature). Reheat to at least 165°F before eating. Source: USDA Food Safety and Inspection Service.
FAQ
Can I use this setup for smoking, not just grilling?
It’s the foundation for it — add a wood chip packet over the direct-zone coals and cook on the indirect side, and you have basic hot smoking. Dedicated low-and-slow smoking usually runs cooler and longer than this guide’s indirect range.
How do I keep charcoal at a steady temperature for hours?
Control airflow with the dampers rather than the amount of charcoal, and top up with unlit briquettes on the hot side before it dies down completely, not after.
Does a two-zone setup work on a pellet smoker?
Pellet smokers are indirect by design already, so the direct/indirect split doesn’t apply the same way — most don’t have an open-flame direct zone at all unless the model specifically includes a searing feature.